
Coastal Farmhouse Kitchen
When life gives you oak cabinets…

Before…

I am no stranger to oak cabinets. In fact, they seem to follow me from house to house. As time and budget has allowed they get replaced with something more contemporary. When we first saw the beach house it was a little tough to look past the oak, which was everywhere. We had (initially) given ourselves about a month to complete the home and a tight budget that included all the furnishings as well. This meant demo would only be limited to the upper cabinets. So demo we did…


Open shelving
Before we had even closed on the beach house I had the kitchen design sketched out in my head. I am such a fan of open shelving. I loved the idea of all the essentials being readily available to guests staying at the beach house. No searching through cabinet after cabinet to find what they needed. We had removed uppers from our farmhouse as well and replaced them with open shelving. When you’re on the shorter side, upper cabinets are just a reminder of the inches you don’t have, haha.
Through my open shelving spree in the farmhouse I became acquainted with an amazing company out of Salem, OR, Cascade Iron Co., that makes hand-forged shelving brackets. It’s owned and operated by a brother/sister team who couldn’t be nicer. We’ve chosen their J brackets in the natural wax finish for most of our projects. I also recommend their toggle bolts which makes installing them super easy!

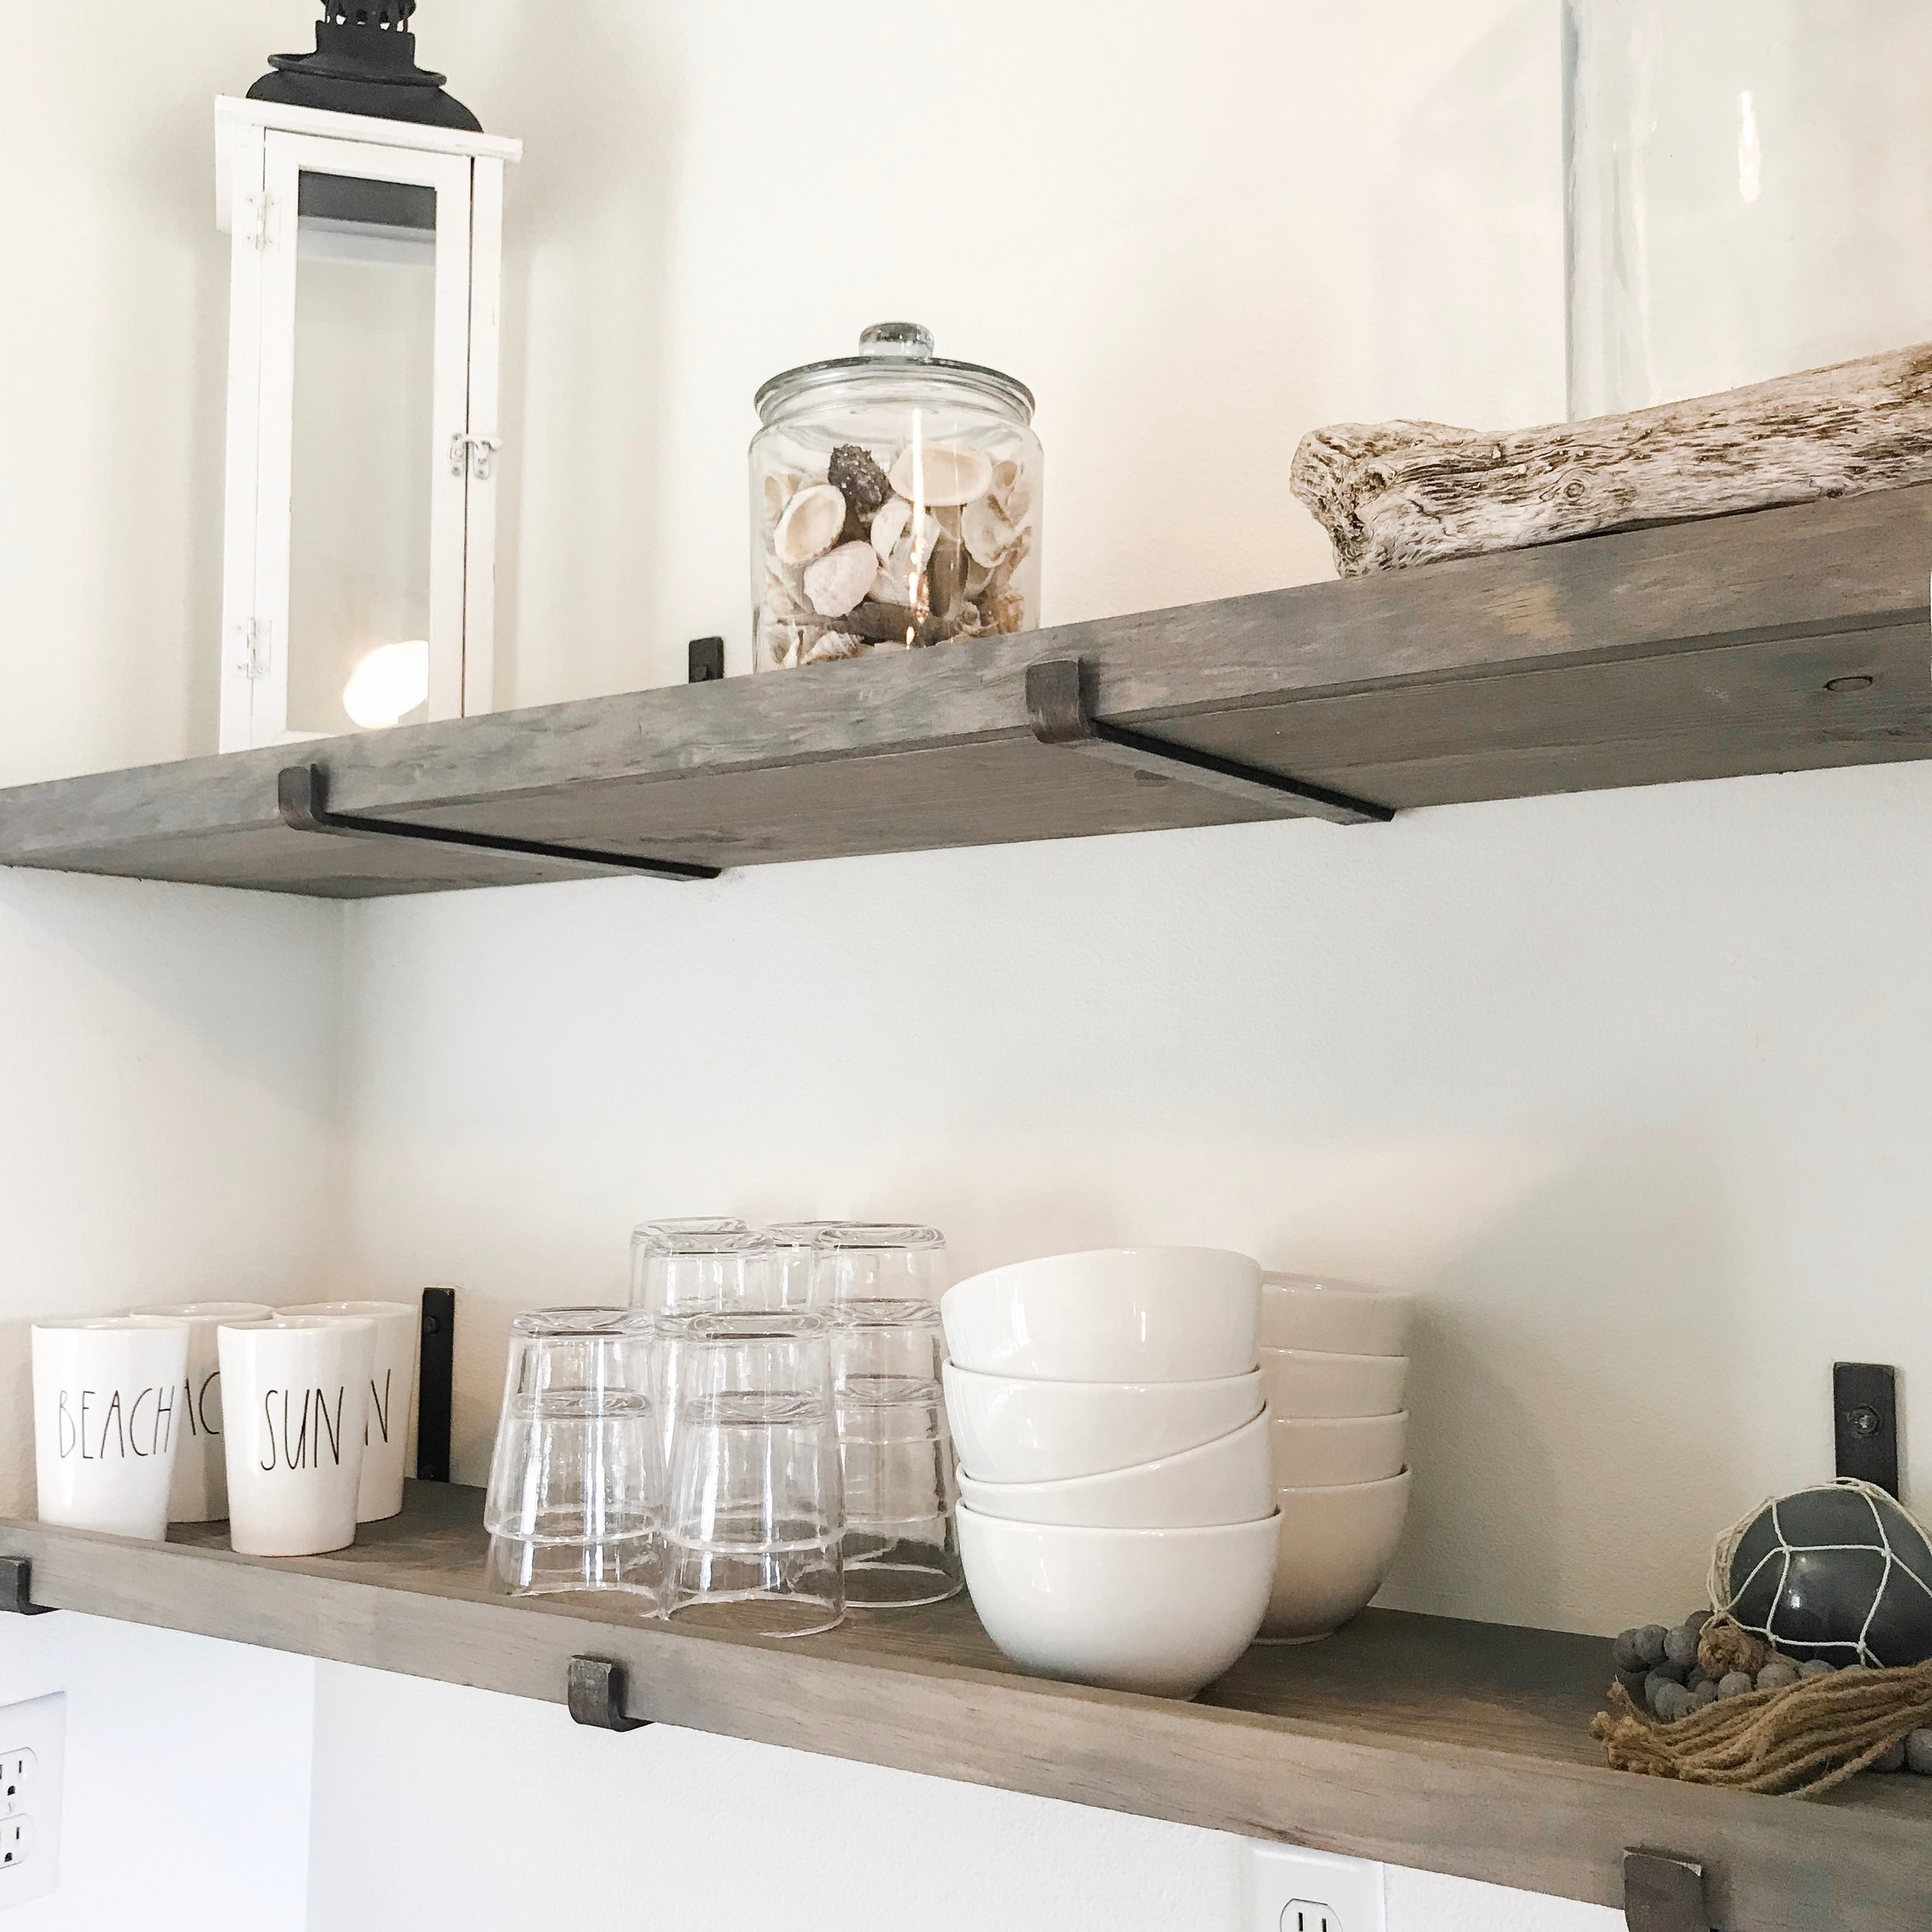

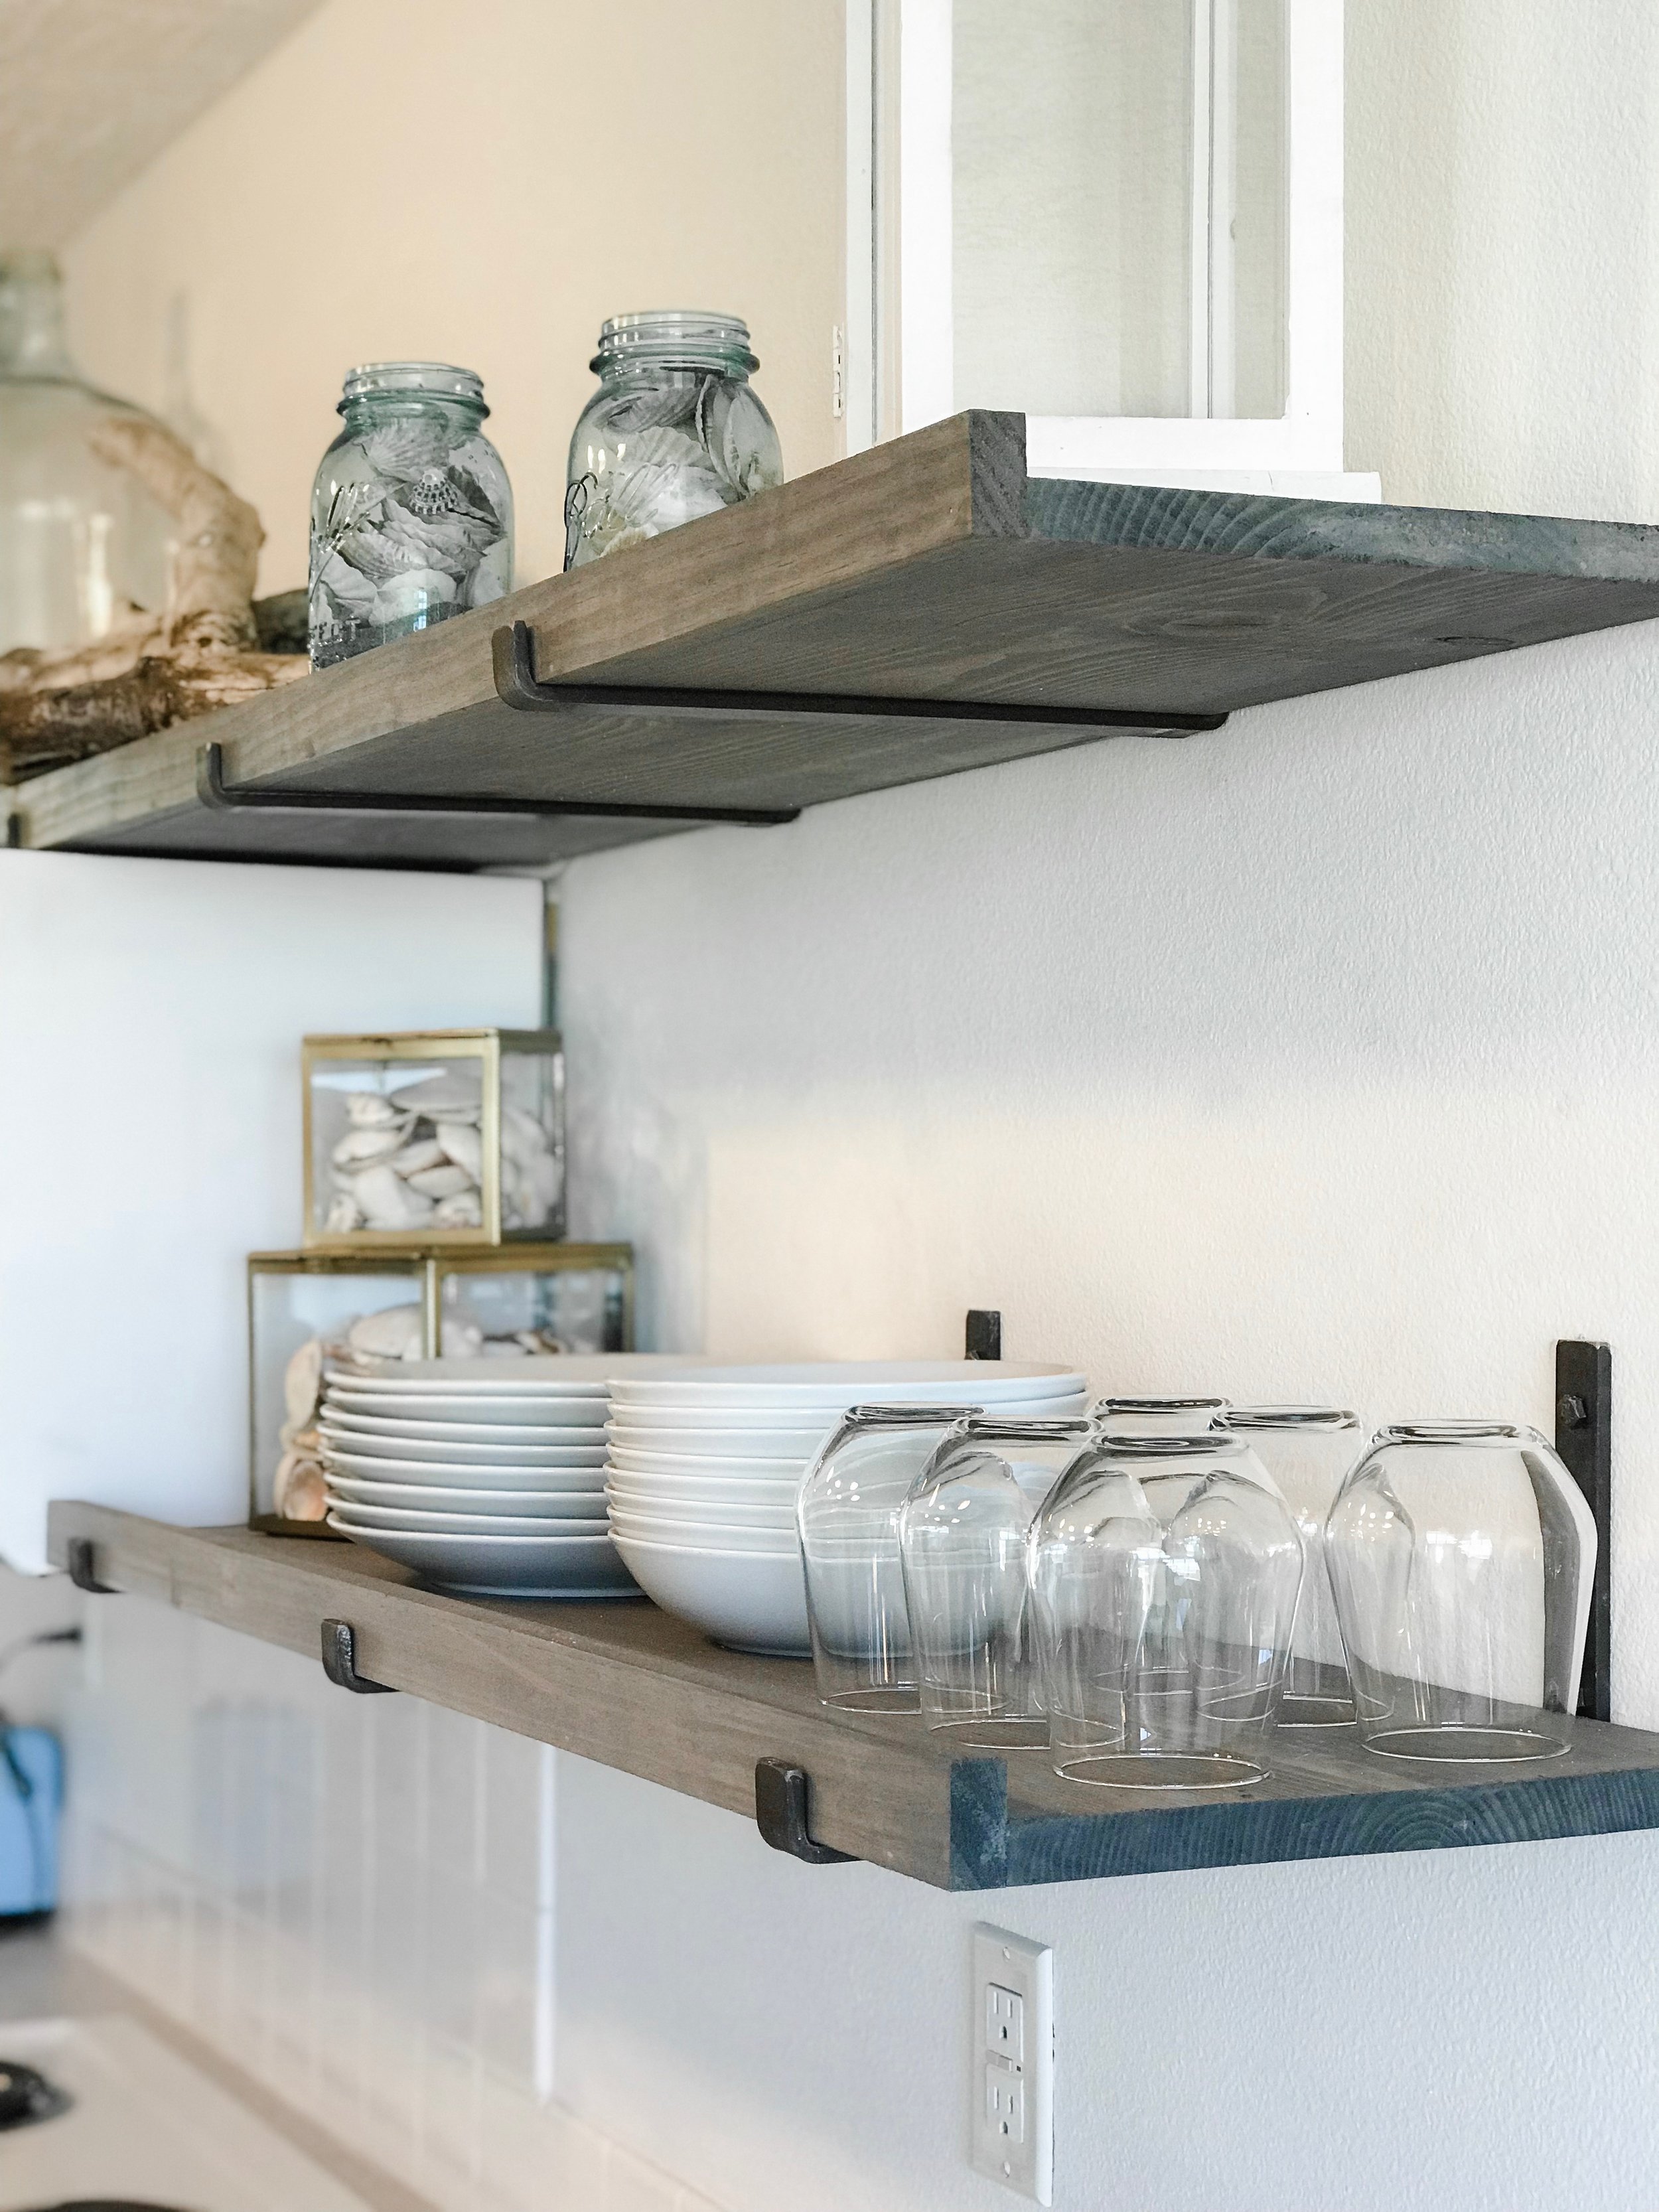
My original design didn’t plan to include the lip on the shelving. But, one of the “fun” things about wood is that it’s never the actual size that it says it is. A 12-inch board isn’t truly a 12 inch board. It could be an 11.678 inch board. This makes things interesting when you get a 12 inch bracket. So the lip was a happy accident to fill the gap, and I have to say, I’m so happy it worked out like this. It gives the shelf a little more finish than originally planned.


Cabinets
Did I mention this remodel had a budget? We lucked out with the fact that the cabinet style was already what we wanted. A shaker style cabinet happens to be my favorite and one that I don’t think goes out of style! So, instead of replacing the lower cabinets, we decided to paint them. Our hunt for the best cabinet paint led us to Benjamin Moore Advance. When the guy at Home Depot tells you it’s the best cabinet paint and they don’t carry it, you know it’s an honest opinion! It’s best to remove the doors any time you’re painting cabinets. Start with a light sanding. I can tell you from experience that if you don’t sand them, they’re more likely to chip! After sanding, you’re going to want to do a coat of primer before you apply the paint. KILZ primer is my favorite; It will give you a good base even when you forget to pre-sand. (Don’t ask me how I know this.) We used a brush to apply and did two coats of paint. We did try a roller that was recommended to us but we liked the smoothness of the brush strokes better than the roller. The paint is self-leveling but the roller still gave us a little bit of a texture. For the paint color we chose Benjamin Moore Silver Dollar, #1460. This warm gray worked perfectly with our warmer toned finishes.

Finishes
I knew that taking on such a big project in such a small time wasn’t going to leave much time to go back and forth on finishes. It’s a 2.5 hour drive from our farm in Washougal, WA to Long Beach, WA where the beach house is, so quick decisions and Amazon prime became my best friend. I knew I didn’t want to play it safe and go with nickle finishes, but it still took a bit of time before I had found enough items in the right finish to be convinced that brushed brass was the way to go. There is a fine line between modern brass and 90’s era gold and I can tell you I was definitely trying to avoid the latter. The brushed brass brought a fun nautical feel to the house and warmed up each space so perfectly. The kitchen is where this is the most prominent. I love the modern pulls I chose from Amazon. I chose the 4-inch length to give it an even more modern feel.
I loved the faucet and it worked perfectly with the pulls. I’ll tell you that both look a little more “gold” online than they do in person. They are really a perfect brushed brass.
Check back to see my next post on all the little details that completed the beach house kitchen!